FabTools 0.92 HowTo
Description for all individual components of FabTools
Main Site: FabTools
Download: Latest FabTools
Examples: FabTools examples
AutoList capability:
Many of the components have AutoList capability. "AutoList" is a feature of FabTools, that makes it a lot easier to find the desired parameters. AutoList is very simple to use. Just connect a Value List component from Grasshopper to AutoList capable inputs, and the list will get all possible values for that input.
Look for all inputs with the sign:AutoList
So instead of finding the right value all the time, just connect a Value List and choose a parameter. Once you know the values you can also submit those via a panel or any other data provider.

Advanced Bake:
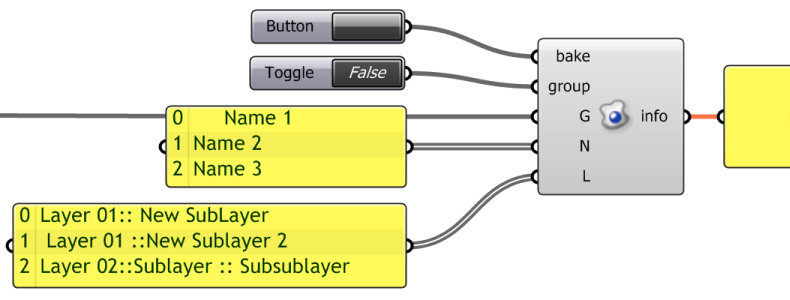
Inputs:
- (BOOL) bake
- (BOOL) group
- (Geometry) G
- (String) N
- (String) L
Outputs:
- (String) info
Description:
This component bakes all kind of geometry. You can set an object name and a layer for each object. If you set group to true it will group the objects from each branch in a datatree of geometry objects.
You can use the components BakeAttributes, PlotAttributes and BakeArrows (only for curves) to set other properties for the bake. In case you have set the attributes object name and layer with one of these, the parameters on the N or L input will be ignored for that object.
If you provide only points (in one branch) or a grasshopper group of points the component will bake a point cloud.
The output info shows informations about the bake success.
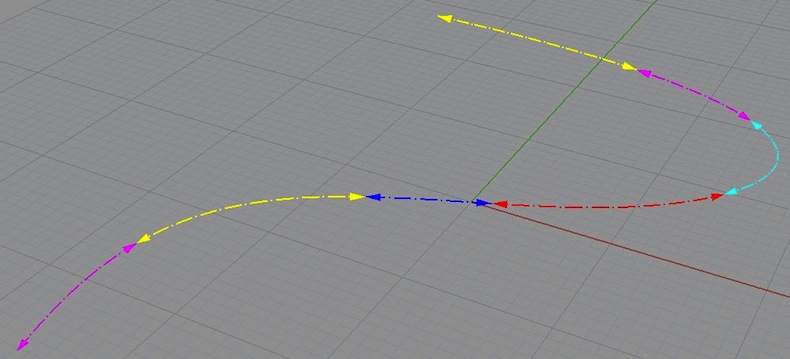
Bake Arrows:
![]()
inputs:
- (Curve) C
- (String) sAutoList
Outputs:
- (Curve) C
Description:
Use this component to set arrowheads as a bake attribute. This component will store the information directly on the curve object and passes the information to the bake component.
Layer Attributes:
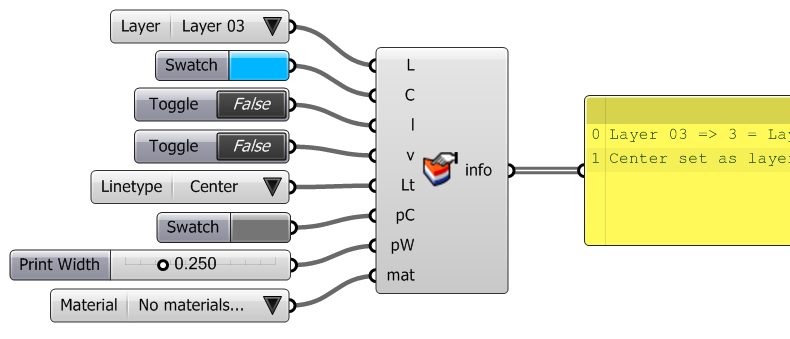
inputs:
- (String) LAutoList
- (Colour) C
- (BOOL) l
- (BOOL) v
- (String) LtAutoList
- (Colour) pC
- (Double) pW
- (String) matAutoList
Outputs:
- (String) info
Description:
Use this component, to set attributes to a certain layer. If you supply the name for a layer, that does not exist, a new layer will be created.
Bake Attributes:
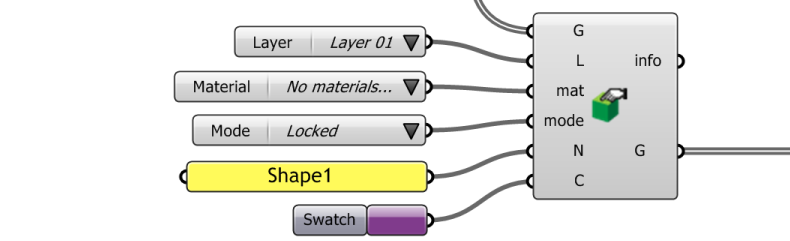
inputs:
- (Geometry) G
- (String) L AutoList
- (String) matAutoList
- (String) modeAutoList
- (String) N
- (Colour) C
Outputs:
- (String) info
- (Geometry) G
Description:
This component sets bake attributes for all kind of geometries. Connect a value list to the L, mat or mode input to get all available options. You can also set a string for a layer, that does not exist. In this case the bake component will create the layer. This works also for sublayers.
The information will be stored directly on the geometry and is passed through other grasshopper components. So if you later decide to bake, the attributes will still be there.
Plot Attributes:

Inputs:
- (Geometry) G
- (String) LtAutoList
- (Colour) pC
- (Double) pW
- (Int) D
Outputs:
- (String) info
- (Geometry) G
Description:
This component works the same way as the BakeAttributes component. The attributes here are mostly for print or layout purposes. Again the information will be stored directly on the geometry.
Show Attributes:

Inputs:
- (Geometry) G
Outputs:
- (String) info
Description:
Show Attributes allows you to check all set parameters on every kind of geometry. If you manipulate the geometry with grasshopper after you have set some attributes this is helpful to check for the parameters before you bake.
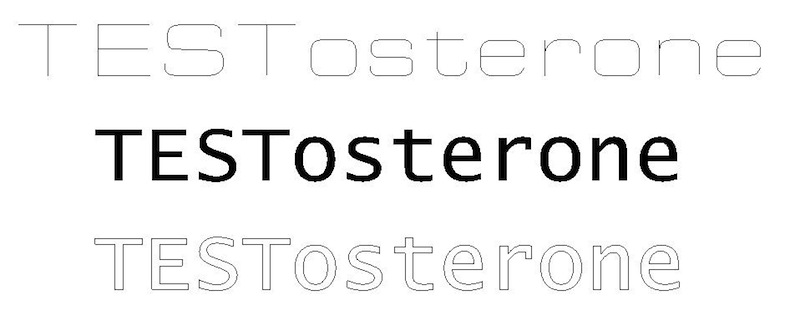
Engrave Text:
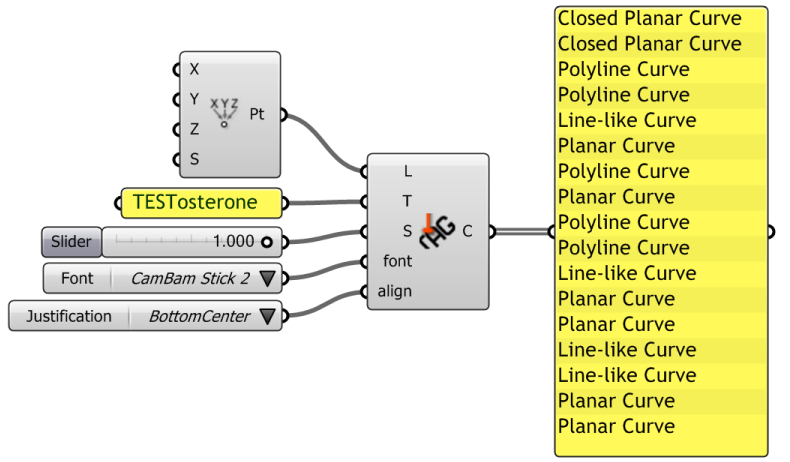
Inputs:
- (Plane) L
- (String) T
- (Double) S
- (String) fontAutoList
- (String) alignAutoList
Outputs:
- (Curve) C
Description:
This component creates single line text. The optimal curve for engraving. You can choose from 9 different font styles and set an alignment to the origin of the location plane.
The output are Curves. Some fonts have issues with capital letters but numbers and small caps work on all fonts.
Text 3D Advanced:
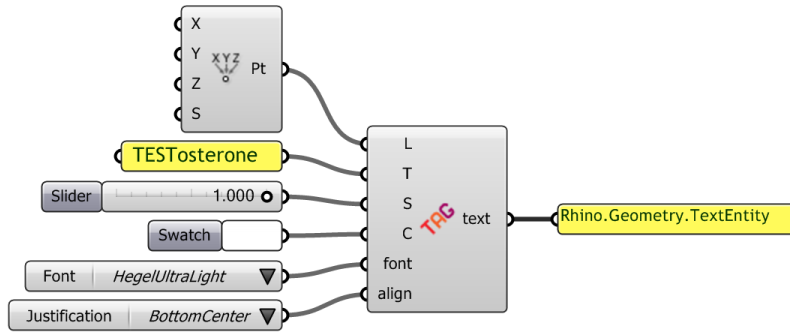
Inputs:
- (Plane) L
- (String) T
- (Double) S
- (Colour) C
- (String) fontAutoList
- (String) alignAutoList
Outputs:
- (TextEntity) text
Description:
This component creates 3d text with additional color attribute, font and alignment. You can choose from every font installed on your machine. It outputs an object of type TextEntity. The TextEntity can be baked with the BakeAdvanced component.
Text Contour:
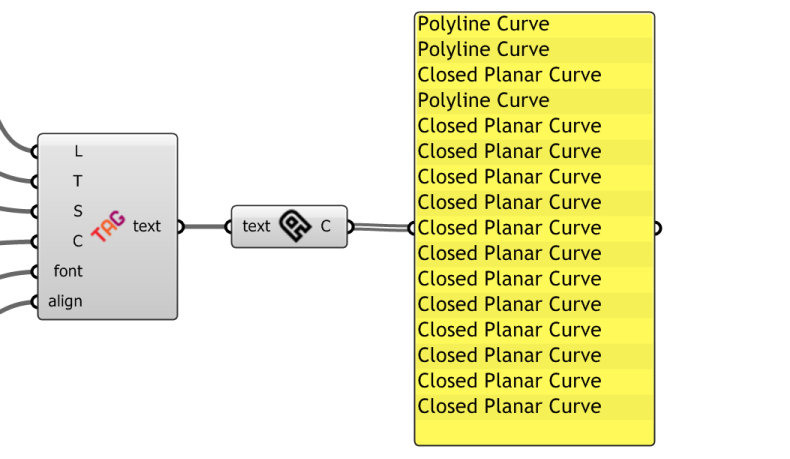
Inputs:
- (TextEntity) text
Outputs:
- (Curve) C
Description:
This component allows you to extract all curves from 3d text created with the Text 3d Advanced component. If you're not satisfied with the single line fonts or you want the outlines from a specific font on your machine, this is the right tool.
Unroll:

Inputs:
- (Brep) B
- (Point3d) P
- (Curve) C
- (Double) off
- (Rectangle3d) f
- (String) align
Outputs:
- (Surface) S
- (Curve) C
- (Point3d) P
- (Rectangle3d) f
Description:
This component unrolls single curved surfaces and breps and places them on the construction plane. You can specify a frame, so the resulting unrolled surfaces will be positioned in a grid layout with this frame and a desired offset.
Aligned Dimension:
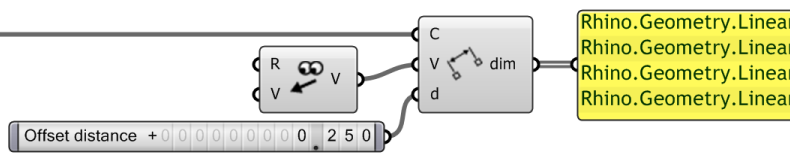
Inputs:
- (Curve) C
- (Vector3d) V
- (Double) d
Outputs:
- (LinearDimension) dim
Description:
This component creates aligned dimensions from a Line, Polyline or Curve. The optional V input sets the view direction vector. The distance moves the dimension text and leader.
Angular Dimension:

Inputs:
- (Arc) A
- (Double) d
Outputs:
- (AngularDimension) dim
Description:
This component creates an angular dimension from an arc or circle curve. Optionally the distance moves the dimension text and leader.
Dimensional Chain:
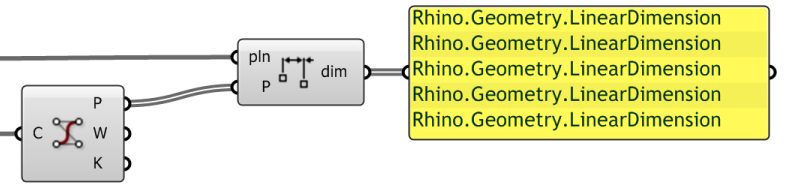
Inputs:
- (Plane) pln
- (Point3d) P
Outputs:
- (LinearDimension) dim
Description:
This component creates a dimensional chain on the chosen plane. The submitted points result in linear dimensions between each other and aligned to the plane.
Diameter Dimension:

Inputs:
- (Arc) A
- (Point3d) P
- (Vector3d) V
Outputs:
- (RadialDimension) dim
Description:
This component creates a diameter dimension from an arc or circle curve. The optional P input sets the location of the text leader. The optional V input let's you set a view direction vector.
Edit Dimension:
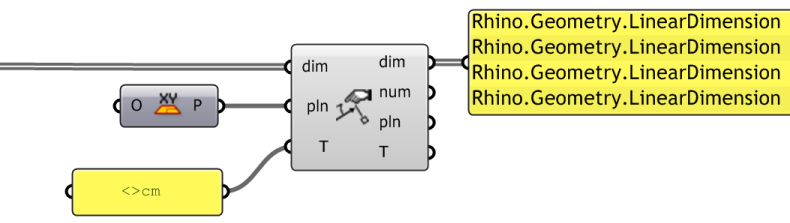
Inputs:
- (*Dimension) dim
- (Plane) pln
- (String) T
Outputs:
- (*Dimension) dim
- (Double) num
- (Plane) pln
- (String) T
Description:
This component can change the plane and text of a dimension object. It also returns the numeric value, plane and text from a dimension object.
Hatch:
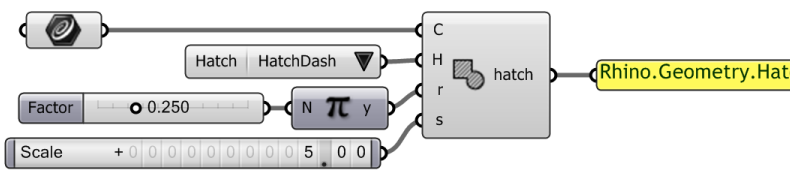
Inputs:
- (Curve) C
- (Integer) HAutoList
- (Double) r
- (Double) s
Outputs:
- (Hatch) hatch
Description:
This component creates a hatch from closed planar curve. The input H sets the hatch pattern. The input r sets the rotation and input s the scale of the resulting hatch.
Text Dot:

Inputs:
- (Point3d) P
- (String) T
Outputs:
- (TextDot) dot
Description:
This component creates a TextDot object from a Point3d location and a text. The returned object can be baked with the Advanced Bake component.
View Direction:

Inputs:
- (BOOL) R
- (String) V
Outputs:
- (Vector3d) V
Description:
This component returns a vector for the current camera direction. If the input V is set to a specified viewport, the component returns the camera direction of that viewport.
Examples:
Contact:
Please contact me if you have questions or suggestions:
E-Mail: florian@blickfeld7.com
Austria: +43 650 7939197
Italy: +39 338 7939197
Switzerland: +41 77 418 11 70
![]()